Centos 9 Stream on RPI4
Steps to use distro Centos 9 Stream on RPI4
CentOS 9 stream is out, with native aarch64 ISO, but it doesn’t directly support rpi4, which is an annoyance. With a bit of fiddling, it can be made to work nicely.
I didn’t find any articles about it yet, so here is the necessary flow.
1. Start the CentOS 9 Stream ISO download going
It’s 6.5GiB so best to get that started first.
wget -O c9.iso "https://mirrors.centos.org/mirrorlist?path=/9-stream/BaseOS/aarch64/iso/CentOS-Stream-9-latest-aarch64-dvd1.iso&redirect=1&protocol=https"
2. Use the latest eeprom bootloader on the rpi4
Download rpi-imager, on Fedora at least this is actually available as a distro package. It automates getting the latest bootloader and creates a bootable SD image that flashes your rpi4 with it.
A sacrificial SD card is needed, if you only have one RPi4 to do, it can be the same one you will put CentOS on later. If you have a few RPi4 or expect to get more, you probably want to dedicate an SD card for this so you can later avoid having to repeat all this and just boot the Rpi with it one time to update the EEPROM as needed.
- insert a sacrifical SD card in your development machine
- run
rpi-imager - Select “Operating System” pulldown
- “Misc utility images”
- SD Card Boot (assuming that’s your usual boot pattern)
- Select “Storage” pulldown
- Select the destination SD Card
- WRITE
- remove the card
Boot the Rpi4 one time using this card, it will flash the EEPROM to the latest bootloader.
3. Use the RPI4-aware UEFI “Firmware”
We have to go a little “off-piste”, but not much. The issue is that the boot flow special requirements for rpi4 bootloads is not handled by CentOS out of the box. So we need to own the first partition and put RPi-aware UEFI pieces in there, and later tell CentOS it can have the rest of the SD card. CentOS gets the situation (once we tell it at install time later) and it will all fly well.
- insert the sd card intended for the install in your development box
fdisk /dev/<device>, eg,/dev/sdapto double-check you are looking at the expected device- delete any existing partitions (d 1, d 2) etc
- add a new p1 with
n, set size to+200M t 0cto set the type to FAT32wto writepartprobeto make sure we re-read the new partition tablemkfs.vfat /dev/sda1to format our new partitionsudo mount /dev/sda1 /mnt- Browse here to see the newest available UEFI firmware
- Download
RPi4_UEFI_Firmware_vX.YZ.zipand unzip it - Copy the unzipped files into your partition
sudo cp -rp RPi4_UEFI_Firmware_vX.YZ/* /mnt - sudo umount /mnt
- remove the sd card and plug in the RPi4
UEFI is kind of awful, but it does impose some order on the boot flow rather than an increasing amount of random SBC flows to support, and lets us more or less look like a PC install. As part of that, it wants to use ACPI instead of DT to start the kernel, but that works on upstream kernels nowadays… I don’t think it’s what we would be using if we could do it over, but that’s how it is.
4. Copy the ISO on to a USB stick
- insert your USB stick that will hold the Centos ISO image
- check with
dmesg | tailwhat sdX your USB device is using - check with
mountif anything that was on it got automounted, if so usesudo umount xxxto unmount them all - Use your favourite tool to copy the iso on to the mass storage device, or
just use
sudo dd if=c9.iso bs=1M of=/dev/sdXwhere sdX will besdaor whatever. - remove the USB stick and put in a USB3 hole of your rpi4
5. Boot for the install

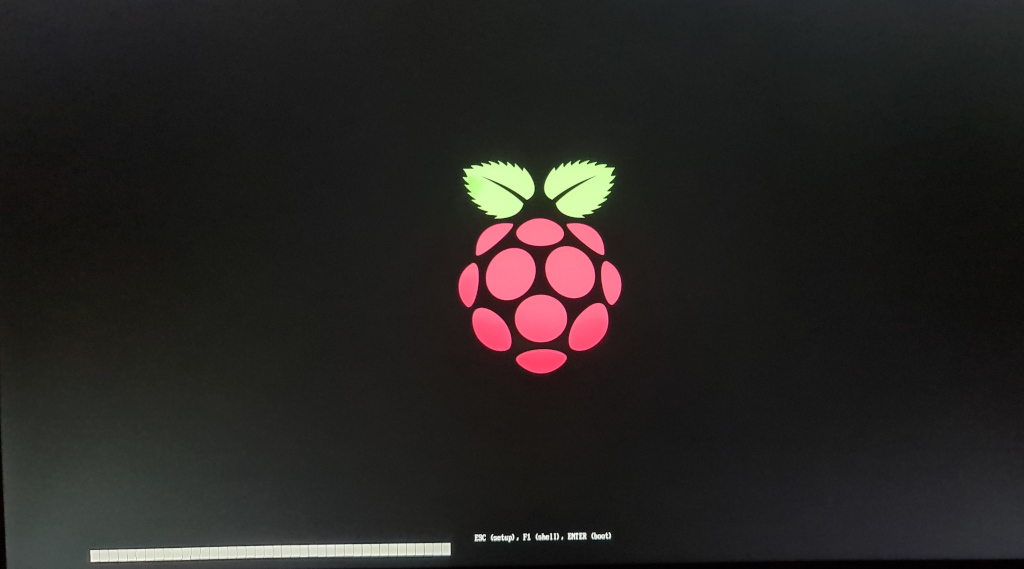
- It should be enough to just boot, you will see the RPI logo and a 5 second countdown… you should be able to just leave it and it will show grub for the CentOS install.
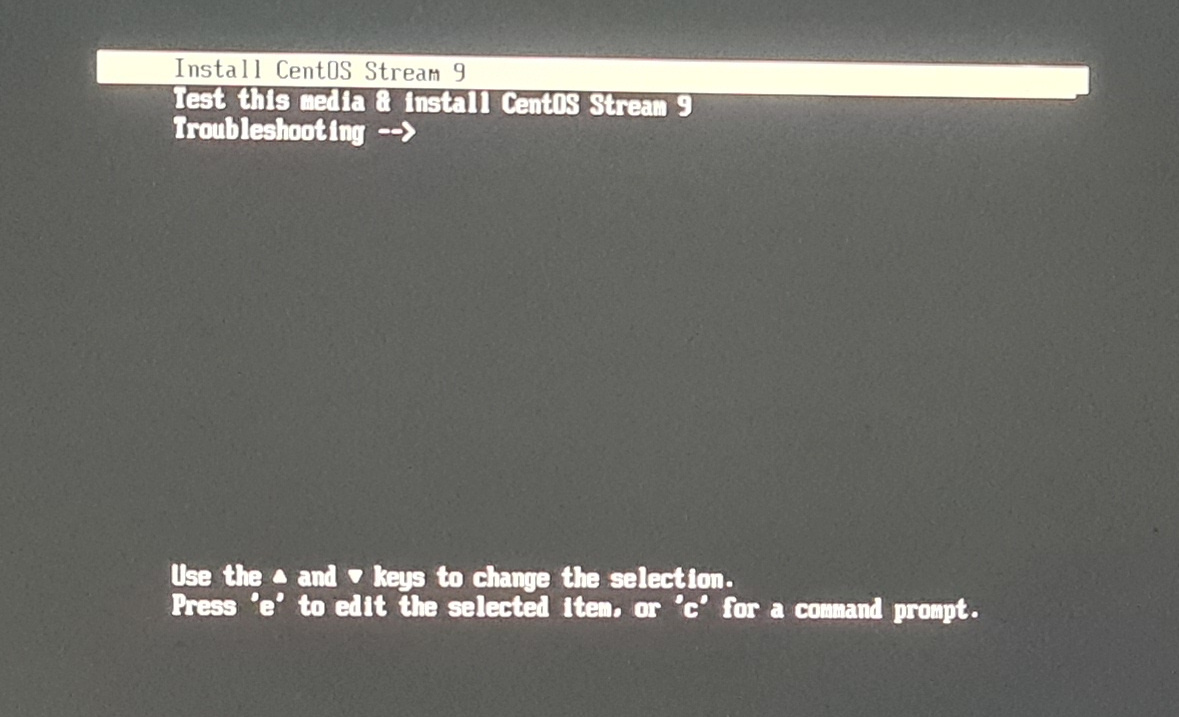
- Select Install Centos Stream 9 and wait a bit.
- The graphical install failed for me, I used text install.
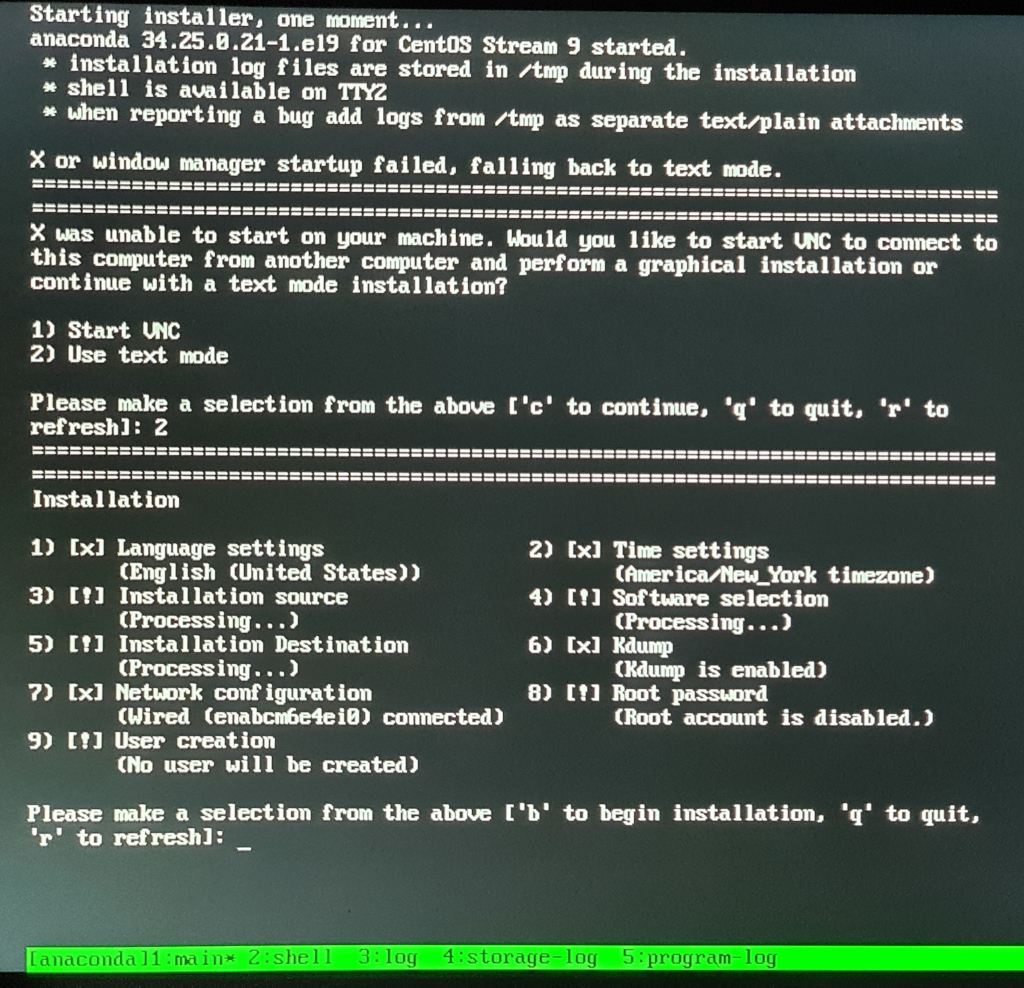
- Select the Install Destination item
5, thencto continue with the default device, and on the next “partitioning options” tell it to use the Unused space on the SD card. This will completely leave your rpi4-aware p1 you have prepared alone
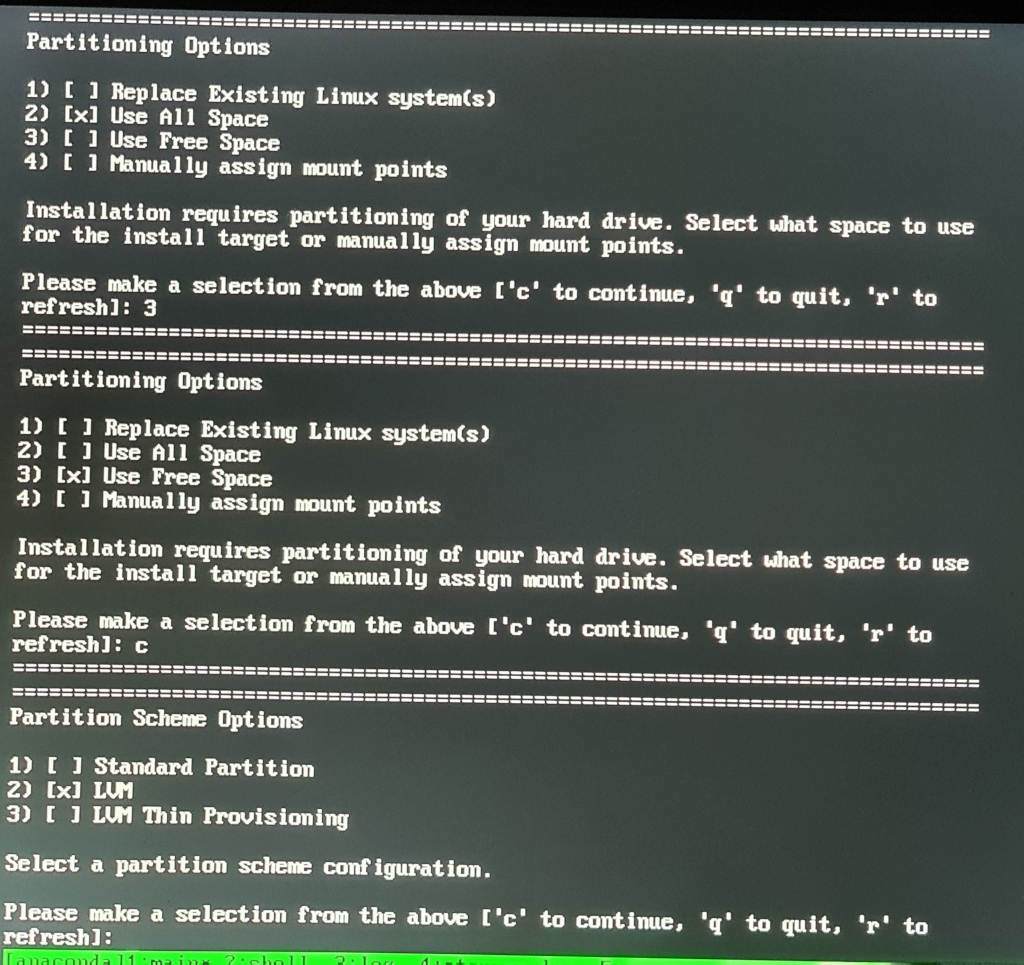
- Personally I don’t think LVM is needed for this kind of thing, at the next
“partitioning scheme options” I selected
1to just use standard partitions. Anaconda on Centos creates XFS partitions (as opposed to Fedora’s BTRFS). - Set up the other missing items like a user (best to mark as “administrator” == entered into sudoers and leave root disabled nowadays) and timezone
- I selected minimal and no extras for package selection, you can choose more things as you like
- Start the install, it takes 10 - 20 minutes or so and then you can hit enter to reboot. It’s logging packages to the display as it goes.
6. Remove the 3GB restriction at UEFI
- hit
ESCat the UEFI boot part to get to the UEFI config menu
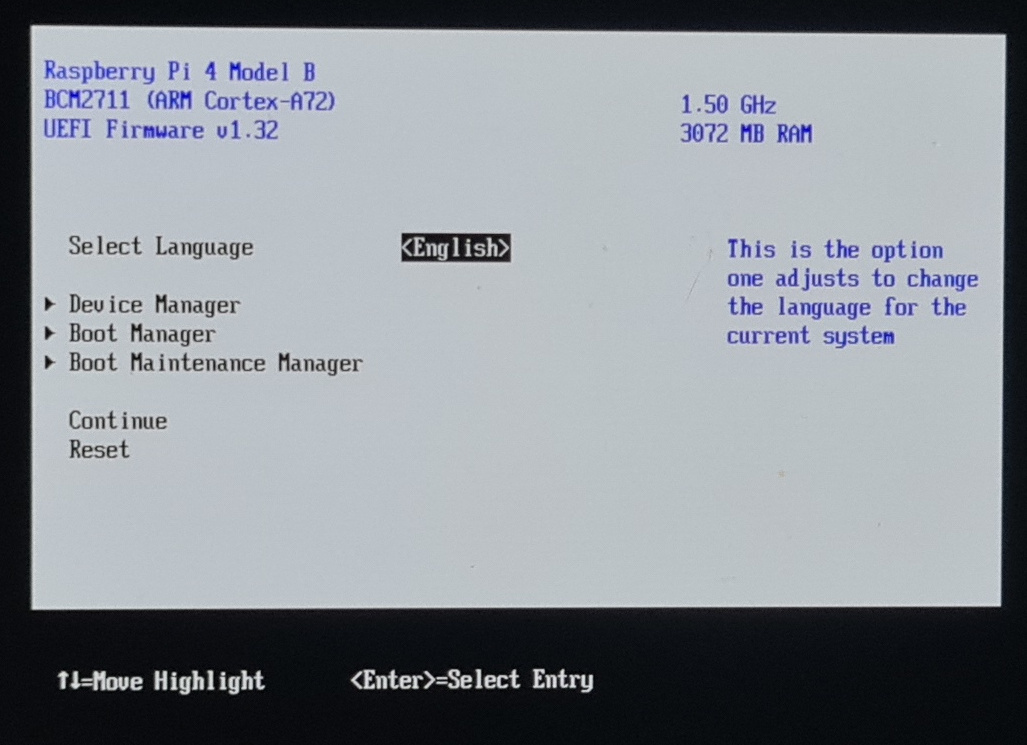
- Select “Device Manager | Raspberry Pi Configuration | Advanced Configuration”
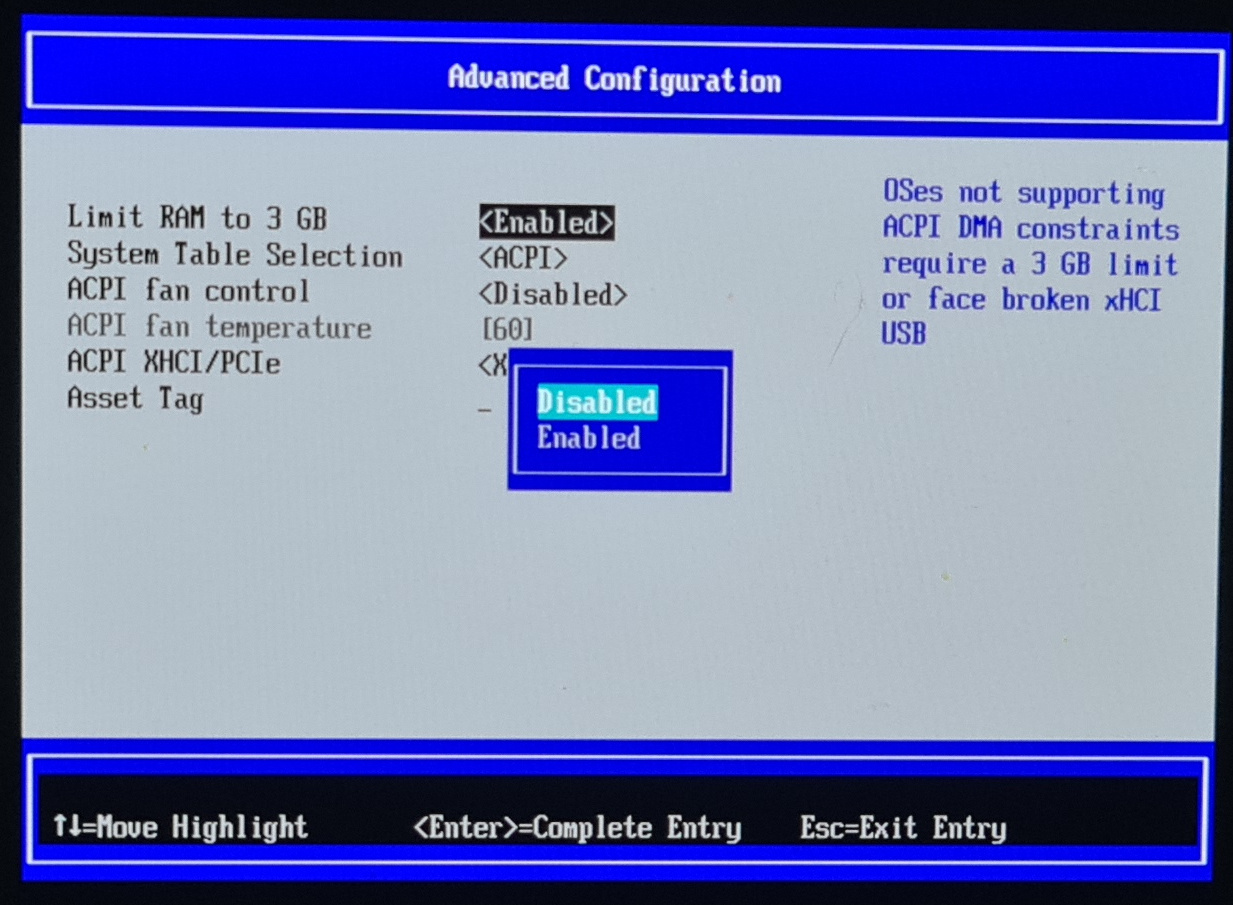
- Change “Limit RAM to 3GB” to disabled, the kernel in CentOS 9 stream is modern enough to not need it (not sure about the installer kernel, which is usually a bit older, which is why it is done here now we are done with the install).
F10andYto save
7. Set the boot order to be SD card first
ESCback up to the top level menu and select “Boot Maintenance Manager | Boot Options | Change Boot Order” and check if Centos 9 is listed as the first, if not, change the boot order to prefer the install on the SD card, thenF10andYagainESCup to the top level and select restart.
8. Boot into CentOS Stream 9
- You should see the GRUB menu coming after the UEFI one times out after 5s, select the top entry
- There’s no feedback to the video console during boot! Just wait a couple of minutes and it will show the login on the video tty and everything up.
9. Jobs from inside the OS
- You will want to ssh in using the user:pw you told it during the install, and set your ssh pubkey, then disable pw based login.
CentOS always had a bizarre packaging split between its core repos (eg, with libuv package) and what on CentOS 8 was called “powertools” epel repo, this contained libuv-devel amongst others). On CentOS 9 Stream, they randomly changed the repo with this stuff to “crb” just to keep life interesting. Enabling it consists of
$ dnf config-manager --set-enabled crb
$ dnf install \
 https://dl.fedoraproject.org/pub/epel/epel-release-latest-9.noarch.rpm \
 https://dl.fedoraproject.org/pub/epel/epel-next-release-latest-9.noarch.rpm
Enjoy!
